Harnessing the Power of "Stories" Plugin: A Step-By-Step Guide
The "Stories" plugin is a compelling feature available exclusively for ChatGPT Plus users. This tool enables you to create personalized, illustrated narratives based on your given prompt, adding a unique flavor to your storytelling experience.
Join the ever-growing community of passionate individuals who have embraced the Chat GPT "Stories" plugin and unlocked a world of unparalleled creativity. People from all walks of life have harnessed the power of this plugin to create immersive narratives, captivating characters, and spellbinding dialogues. But don't just take our word for it — click here to explore reviews and community content that showcases the incredible experiences people have already had with the "Stories" plugin.
Ready to dive into the captivating world of the Chat GPT "Stories" plugin? As a ChatGPT Plus user, you have the exclusive opportunity to embark on an incredible storytelling adventure. Follow the straightforward step-by-step guide below and start creating your own stories today!
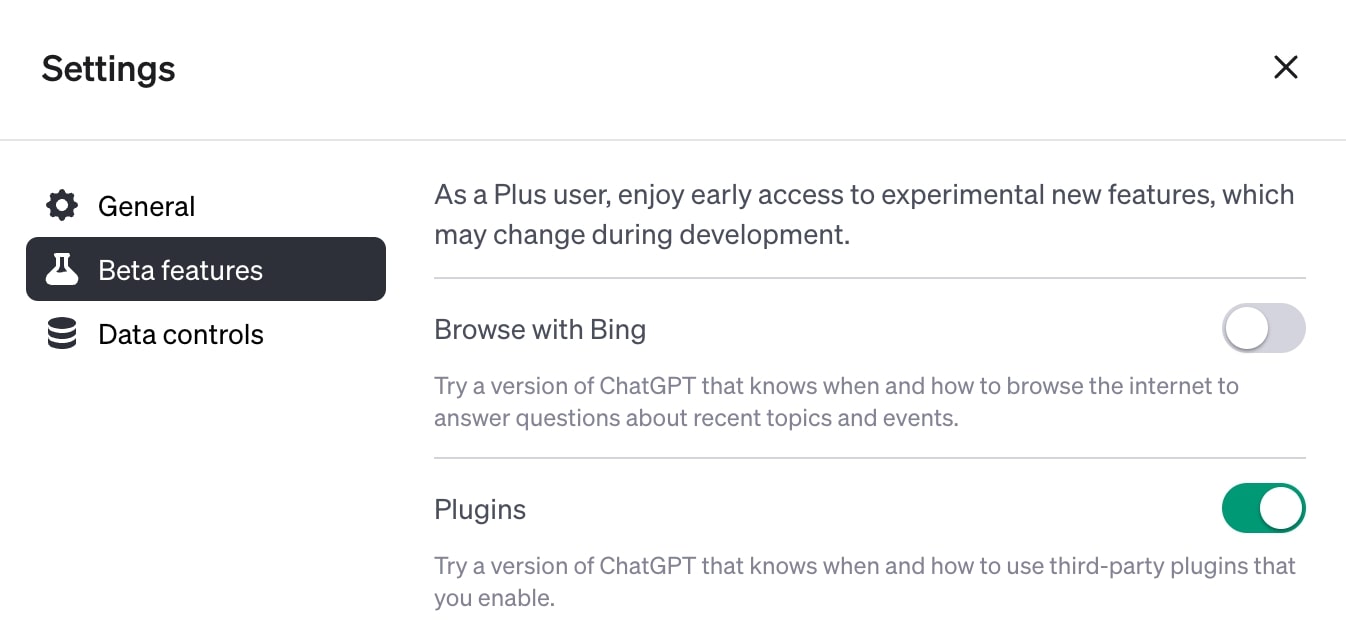
Step 1 - Enable Plugin Access for ChatGPT Plus
If you haven't done so already, click on your profile icon in the bottom left corner of the screen and navigate to the settings menu. Once there, look for the "Beta Features" section and enable the "Plugins" option. Note: This feature is exclusive to ChatGPT Plus users.
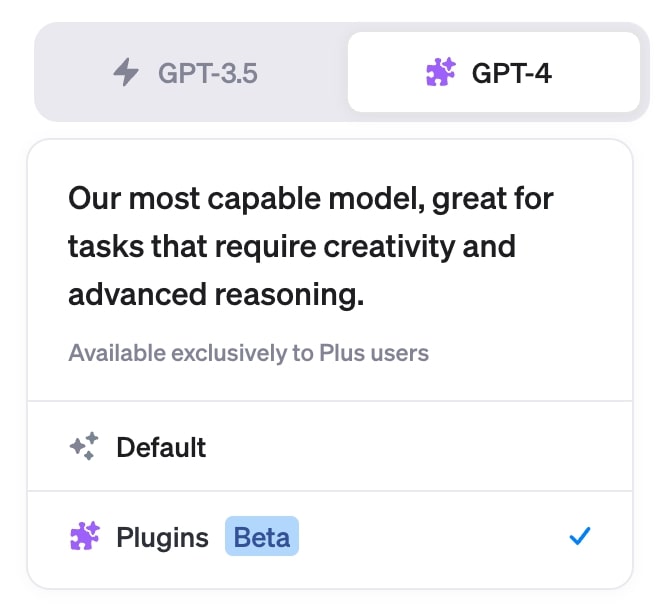
Step 2 - Switch to GPT-4 with Plugins
Your next task is to ensure you're using the right model. On the chat interface, select "GPT-4 with Plugins" as your chosen model. If you're having trouble finding this option, simply follow this link: GPT-4 with Plugins
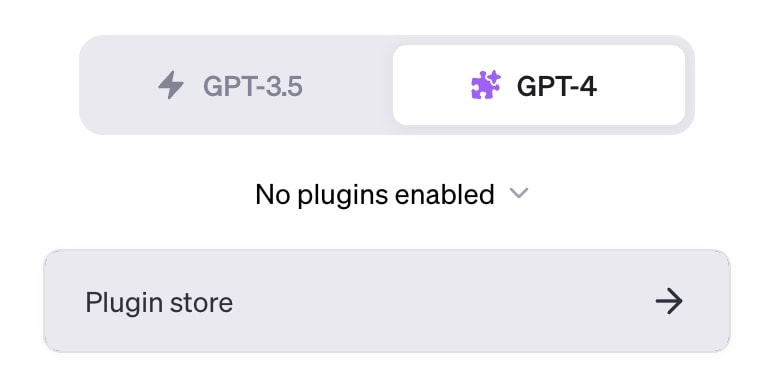
Step 3 - Install the "Stories" Plugin
Now that you're using GPT-4 with plugins, head over to the Plugin Store.
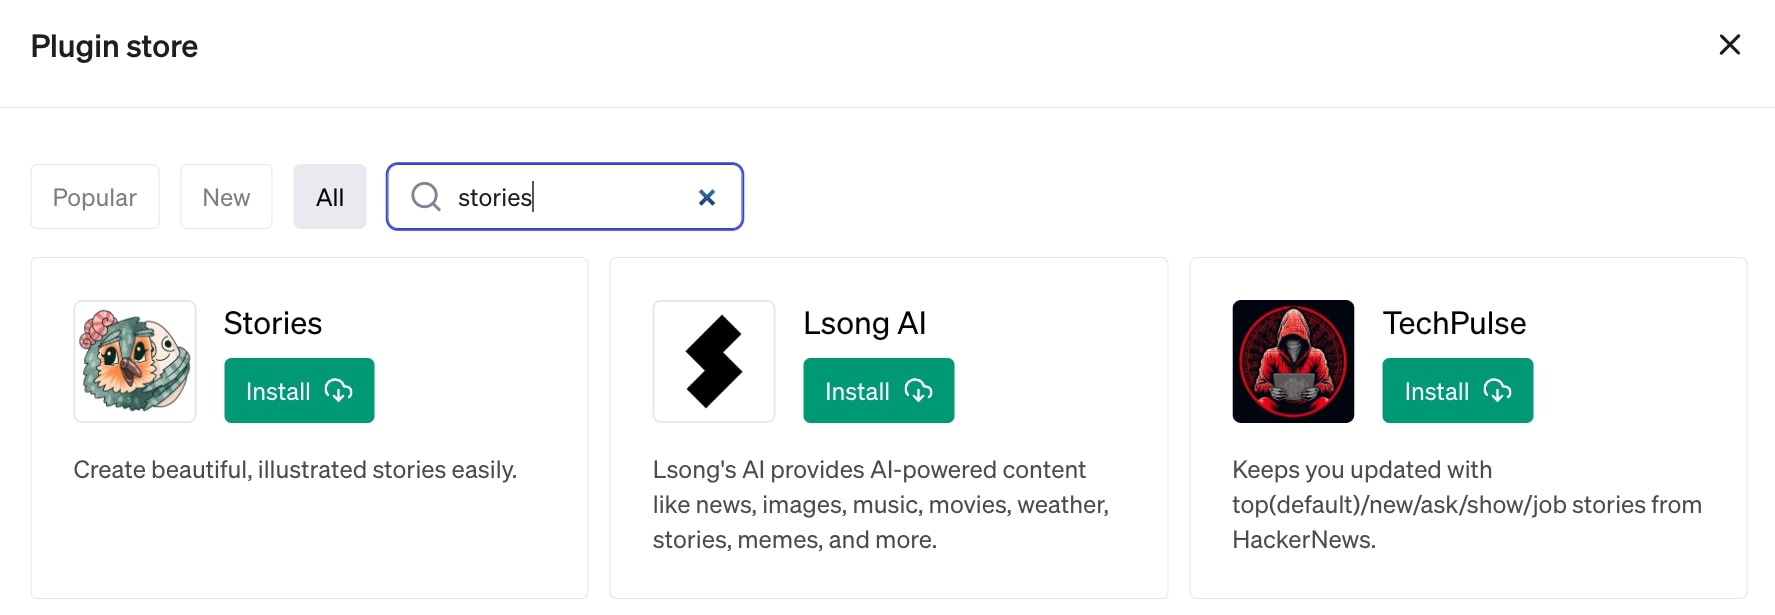
Here, you can browse the available options. Search for "Stories" in the "All" plugins category. Once you find it, click "Install".
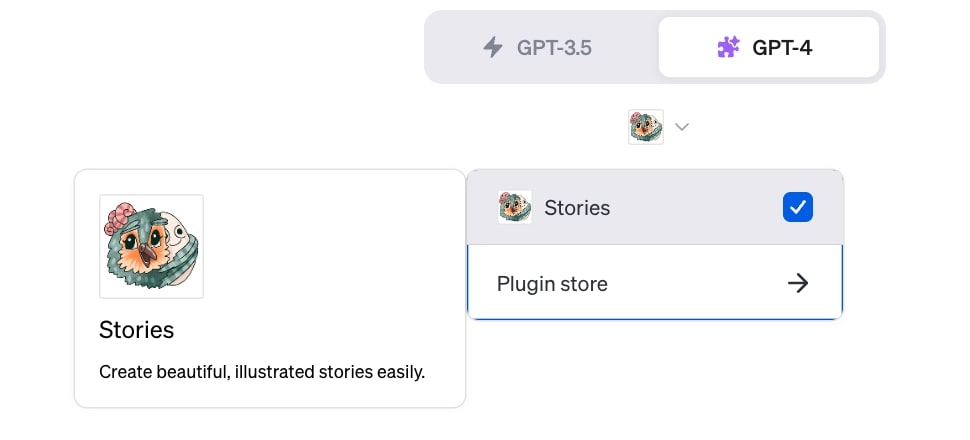
When you return the main chat screen, you should now see that you have the "Stories" plugin enabled.
Step 4 - Let Your Creativity Run Wild
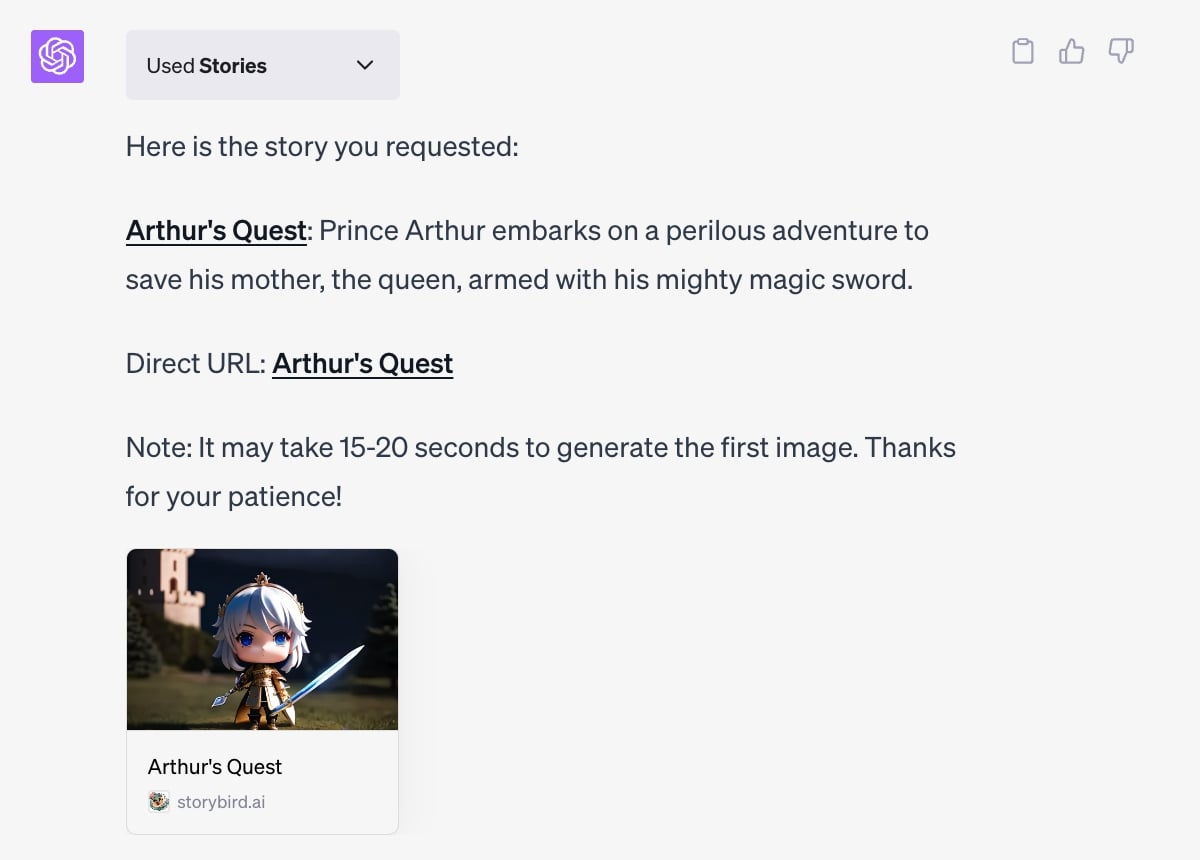
You've set the stage - now it's time to get creative. Write your story prompt in the chat interface. This could be anything that sparks your imagination, like "Write a story about a prince named Arthur on a quest to save his mother, the queen, and his magic sword". To find out more about what makes a good prompt, follow this link: Prompt example guide
Step 5 - Experience the Magic
With the prompt in place, all you need to do now is wait. The "Stories" plugin will spring into action, creating a unique narrative based on your input. Once it's ready, you'll receive a link to access your personalized story. Click this link to read, edit, buy, or publish your creation.
There you have it: a straightforward guide to creating immersive stories using the "Stories" plugin for ChatGPT Plus. Enjoy your journey into the world of personalized storytelling!
Thanks to the AI community for these glowing reviews and helpful guides of our Stories Plugin!
Below are some social media embeds collected from YouTube, TikTok and Twitter to offer a glimpse into the versatile potential of our "Stories" plugin, inviting you to immerse yourself in the creative expressions of our community and find inspiration for your own storytelling endeavors. Discover the captivating possibilities our plugin holds for you.